Introduction
This article is your one-stop guide, providing a step-by-step procedure from initial setup to successful delivery of your site.
Steal my process, and you’ll launch your spectacular Webflow website in no time!
Key Takeaways
- Utilize Webflow's manual backup feature before starting to protect your website's content and design.
- Conduct a Google Lighthouse audit to optimize your website for performance, SEO, accessibility, and best practices.
- Streamline the website-building process by utilizing Webflow's built-in features.
- Checklist for manual testing
- The site settings you need before launching
Backup with purpose and save massive headaches and time
Before diving into the process of launching your Webflow website, it's crucial to take a few preparatory steps that will save you valuable time and prevent any potential headaches down the road.
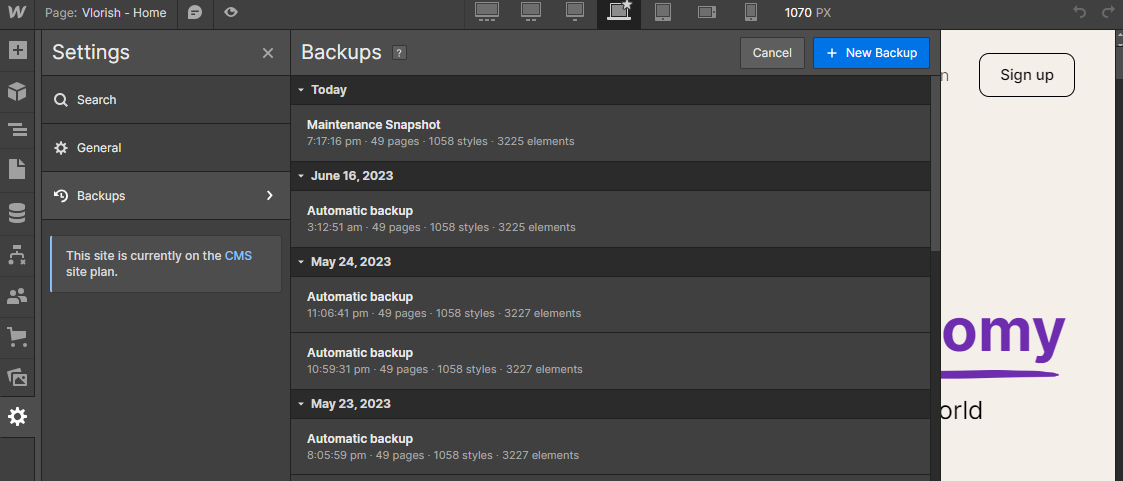
Utilize Webflow’s manual backup feature before starting
- Why backup: this tool protects your website's content and design, safeguarding against any changes or issues that might arise during the preparation and launching stages.
- Understand how regularly Webflow creates backups: The platform automatically saves copies of your site at intervals ranging from 15 minutes to two hours apart - a vital aspect of efficient website management.
- Create a manual backup and label it accurately: this can save you SO much time. Take the guesswork out of it with well-thought-out names.
- Take advantage of the multitude of restore points: With each backup saved within a project, you have several restore points offering flexibility and assurance if things go awry.
- Use the backup feature as a learning opportunity: If you're new to web design or development, using the manual backup feature can be an ideal way to experiment with different features like creating a parallax scrolling site without risking your progress on the project.
Getting a baseline of your site's performance using Google
To ensure your website is optimized for performance, conduct a Google Lighthouse audit, which analyzes and provides recommendations for speed, SEO, accessibility, and best practices. Enhance your site's functionality by implementing these valuable insights.
Discover how this step can significantly improve your website's overall performance.
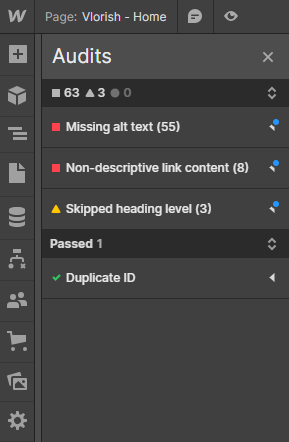
Google Lighthouse will find areas for improvement in Speed, SEO, Accessibility and best practices
Google Lighthouse is a potent tool in your digital marketing arsenal, serving as an open-source utility that evaluates various aspects of your Webflow Website. This powerful kit assesses performance, accessibility, SEO practices, and overall user experience.
For instance, its comprehensive reports help identify potential bottlenecks affecting page load times—a crucial factor for keeping visitors satisfied and eager to explore what your business offers.
Even more critical in boosting visitor interactions is the insight Lighthouse provides on improving Accessibility features—the key to reaching broader audiences irrespective of their physical abilities or disabilities.
The Automated Stuff
Webflow comes with out-of-the-box solutions to help you launch a good site. In this section, I will outline all the solutions you need to be using.
Webflow’s built-in CSS and JS cleanup to remove unused code
Reducing unnecessary classes will allow your site to run faster which is essential for maintaining user engagement and SEO rankings. Utilize Webflow’s CSS and JS cleanup features for a quick and simple way of removing unused code:
- Create a manual backup!
- Locate the built-in CSS and JS cleanup feature in the designer and interaction dashboard.
- Remember to review all changes made during the cleanup process carefully before launching - having a clear overview of all modifications helps prevent potential errors or omissions.
Webflow’s built-in publishing checklist to find and correct SEO
Webflow makes it easy to ensure that your website is optimized for SEO with its built-in publishing checklist. Here's how you can utilize this feature to find and correct any SEO issues:
- Start by accessing the publishing checklist within Webflow's editor.
- Check each item on the checklist to ensure that it is completed correctly.
- Pay special attention to the following key areas:
- Meta tags: Ensure that each page has unique and relevant meta titles and descriptions. Use keywords strategically in these tags to improve search engine rankings.
- Heading structure: Review the heading structure on each page, ensuring that you have a clear hierarchy from H1 to H6 headings. This helps search engines understand your content better.
- Image optimization: Optimize your images by adding alt text, which describes the image content using relevant keywords. This improves accessibility and helps search engines index your images.
- Internal links: Check that all links within your website are working properly and are pointing to relevant pages. Internal linking improves site navigation and helps search engines discover more of your content.
- Mobile responsiveness: Confirm that your website is fully responsive and displays correctly on different devices, such as smartphones and tablets. Mobile-friendly websites receive better rankings in search results.
- As you complete each item on the checklist, mark it as done within Webflow's editor.
- Regularly review your website's performance using tools like Google Lighthouse or other SEO analysis tools recommended in our important facts section.
- Make adjustments based on the insights provided by these tools to further optimize your website for SEO.
Manual/Visual Testing
It’s a tedious and time-consuming task but an essential step to launching your site. The process involves previewing your site on different devices and browsers or using a tool like Browser Stack to ensure optimal user experience. Webflow has a new commenting system in the designer, finally, you can track bugs all in one platform.
Preview your site on different devices and browsers.
To ensure a seamless user experience, it's crucial to preview your Webflow website on various devices and browsers. My experience is IOS is the most problematic. By doing so, you can identify any potential design or functionality issues and make necessary adjustments.:
- Gain insights into how your website appears and functions on different devices, such as smartphones, tablets, and desktop computers.
- Identify any responsive design inconsistencies that may need to be addressed for optimal user experience across devices.
- Check the loading speed of your website on different browsers to ensure quick access for all visitors.
- Ensure that all elements of your website, including images, videos, and forms, are working correctly regardless of the device or browser being used.
- Test navigation and interactivity features to confirm smooth functionality across platforms.
Use a tool like Browser stack
To ensure that your Webflow website is functioning flawlessly, it's crucial to perform manual quality assurance (QA) testing on each page. One incredibly useful tool for this task is Browser Stack.
By utilizing Browser Stack, you can easily test your website on different devices and browsers, ensuring that everything looks and works as intended. This allows you to identify any potential issues or discrepancies and make necessary adjustments before launching your site.
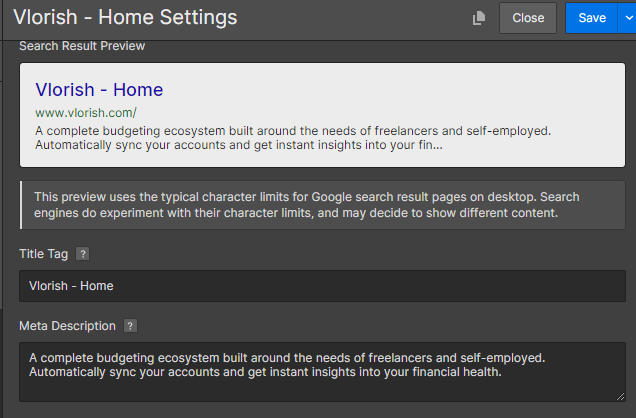
Fill in the SEO titles and descriptions
To optimize your Webflow website for search engines, it's essential to fill in the SEO titles and descriptions for each page. This helps search engines understand the content of your pages and display relevant information in search results. Here's how to do it effectively:
- Craft compelling and descriptive SEO titles and Meta descriptions: provide a brief summary of what users can expect to find on a particular page. Include relevant keywords naturally while focusing on creating engaging and persuasive descriptions that encourage users to visit your site.
- Customize titles and descriptions for each page: Avoid duplicating titles and descriptions across multiple pages as this can confuse search engines. \
- Optimize character limits: Ensure that your SEO titles are no longer than 60 characters and meta descriptions between 120-155
- Incorporate high-ranking keywords: Research popular keywords related to your industry or niche, and strategically incorporate them into your SEO titles and meta descriptions.
- Use action-oriented language: Make use of action verbs or phrases in your SEO titles and meta descriptions to evoke curiosity. For example, instead of "About Us," consider using "Discover Our Story" for a more engaging title.
- Leverage Webflow's built-in SEO tools: Webflow provides powerful SEO features, such as the ability to customize SEO settings for each page.
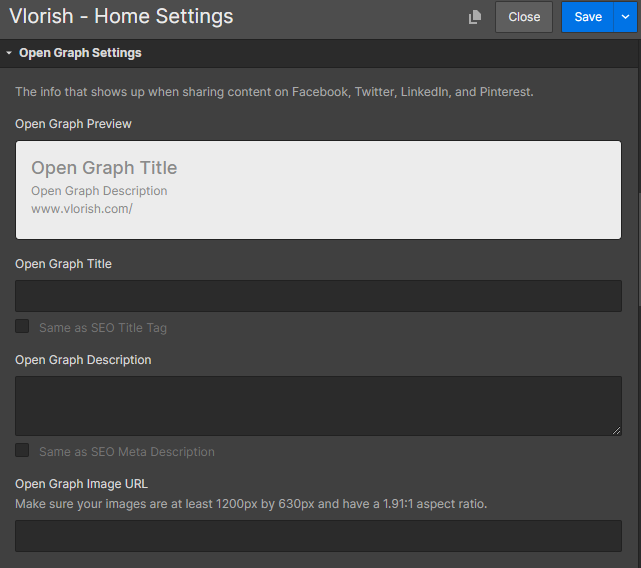
Upload Opengraph images
Adding OpenGraph images to your Webflow website is an essential step in ensuring a successful launch and enhancing the appearance and functionality of your site on social media platforms. Here's a step-by-step guide on how to upload OpenGraph images:
- Create compelling visuals: Design high-quality images that represent the content of your webpages effectively. These images should be visually appealing and encourage user interaction.
- Optimize image size: Make sure your OpenGraph images are optimized for the web to ensure fast loading times. Compress them without compromising their quality using tools like Tiny PNG or Squash.
- Use appropriate dimensions: Follow the recommended image dimensions for OpenGraph images, typically 1200 pixels wide by 630 pixels tall, to ensure they display correctly across various social media platforms.
Spellcheck each page using a Chrome extension
To ensure a professional and error-free website, it's essential to spellcheck each page using a Chrome extension.
Edit the existing 404 page in the "Utility Page" tab and provide an error message with a link back to the homepage.
To ensure a smooth and professional website launch, it is crucial to edit the existing 404 page in the "Utility Page" tab and provide an error message with a link back to the homepage. Increase user experience: When visitors encounter a broken or non-existent page on your website, it can be frustrating. By customizing your 404 page, you can provide a helpful error message that explains what went wrong and guide users back to the homepage.
Test the forms by submitting them
Forms are a vital component of any website, allowing you to capture valuable information from your users. To ensure that your forms are functioning properly and delivering the desired results, it is important to test them thoroughly. Here's how you can test the forms on your Webflow website:
- Fill out each form field with both valid and invalid data to check if the validation is working correctly.
- Submit the form and verify that you receive a success message or confirmation email, depending on how you have set it up.
- Test any required fields to ensure that users cannot submit the form without filling them in.
- Check if any error messages are displayed when users make mistakes while filling out the form.
- Test different scenarios, such as submitting multiple forms simultaneously or leaving certain fields empty, to identify any potential issues.
- Consider testing your forms on various devices and browsers to ensure they work seamlessly across different platforms.
Test links are linked to proper URLs
Testing the links on your website is a crucial step to ensure that everything is functioning as it should. Here are some important things to keep in mind when testing your links:
- Click on each link to verify that it is clickable and leads to the correct URL.
- Test both internal and external links to make sure they are working properly.
- Check for any broken or dead links and fix them immediately.
- Ensure that all anchor text is accurate and descriptive of the linked content.
- Test any buttons or call-to-action links to ensure they are directing users to the intended destination.
- Double-check that any dynamic or dynamically-generated URLs are correctly linking users to the expected content.
- Verify that any redirects or URL changes are working correctly and leading users to the appropriate page.
- Test links across various devices and browsers to ensure compatibility and responsiveness.
- Consider using automated testing tools or plugins to help streamline the process and catch any potential issues.
How to configure your site settings
Configure your site settings by adding your company's logo favicon and webclip, inputting analytics keys like Facebook Pixel and Google Analytics 4, setting the language for your website, ensuring automatic sitemap generation is enabled, and creating a duplicate of the site as a backup precaution.
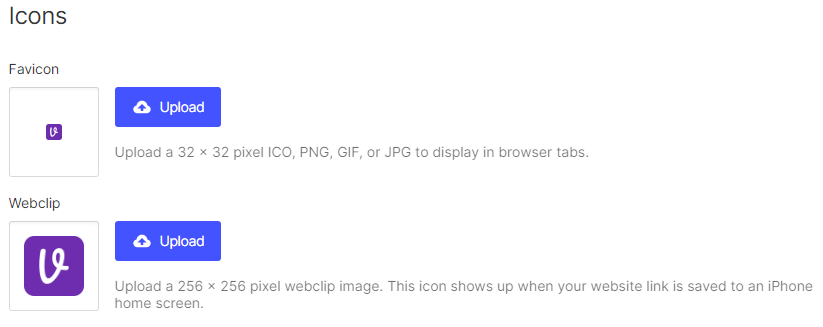
Add your company's logo favicon and Webclip
To enhance your website branding and digital identity, it is crucial to add your company's logo favicon and webclip. Here's how you can configure your site settings to achieve this:
add your analytics keys like Facebook pixel and Google Analytics 4
To configure your site settings and track the performance of your website, it is essential to add your analytics keys like Facebook Pixel and Google Analytics 4. Here's how you can do it:
- Go to your site settings and navigate to the Integrations tab.
- Look for the option for Google Analytics and click on it.
- Paste your measurement ID in the Measurement ID field provided.
- Save your changes to apply the analytics integration.
- To set up Google Analytics for your website or app, log in to your Google Analytics account and access the Admin section.
- From there, select the appropriate property from the Property column and go to Data streams > Web.
- If you are migrating from Universal Analytics (UA) to Google Analytics 4, create a new GA4 property first and begin the upgrade process by listing key items.
- You can find detailed setup tutorials for Google Analytics 4 on platforms like Web Design TutsPlus. These tutorials cover creating a new GA4 property, migrating from UA, and installing the tracking tag on different platforms such as WordPress and Wix.
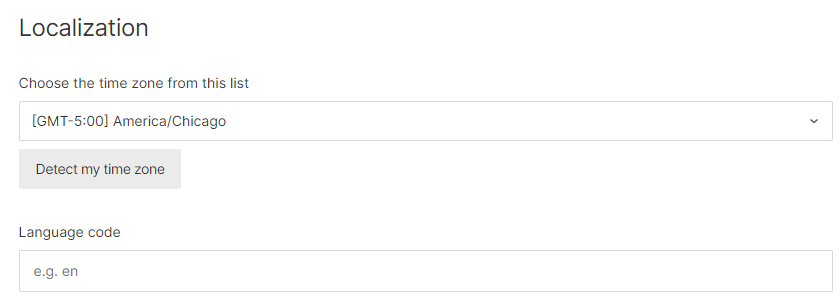
Set your language and time zone settings
When configuring your site settings in Webflow, one important step is to set your language and time zone. This not only helps you tailor the content of your website to your target audience but also enhances the overall user experience.
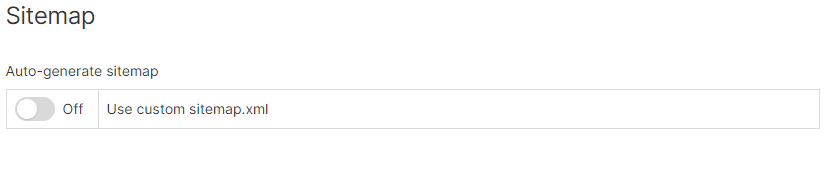
Turn on the automatic sitemap generation setting.
Enabling the automatic sitemap generation setting is a crucial step in configuring your site settings for optimal performance. Here's what you need to know:
Create a duplicate of the site as a backup in case something goes wrong during the transfer.
Launching Your Webflow Website
Do another Google Lighthouse audit to see how far you’ve come
As you near the launch of your Webflow website, it's crucial to assess how far you've come in terms of performance and optimization. This is where conducting another Google Lighthouse audit comes into play.
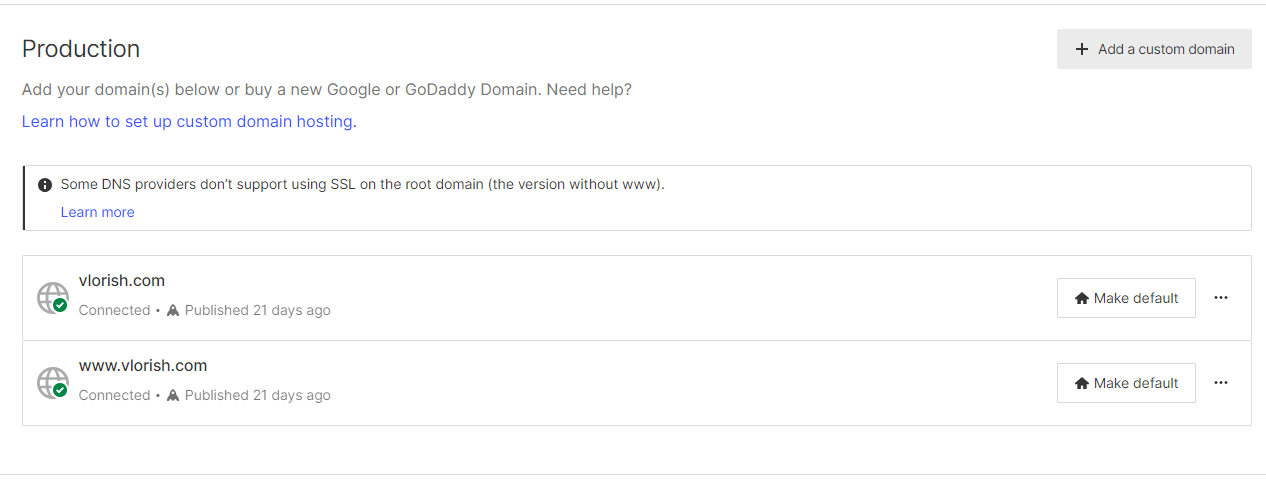
Add a custom domain and enter your root domain
Adding a custom domain and entering your root domain is an important step in launching your Webflow website. Here's how you can do it:
- Purchase a personalized domain on Webflow: You have the option to buy a custom domain directly through Webflow, making the process seamless and hassle-free.
- Configure DNS settings to connect the custom domain to Webflow: After purchasing your custom domain, you'll need to configure the DNS settings. This involves accessing your domain registrar's dashboard and adding the necessary DNS records provided by Webflow.
- Access project settings and hosting tab on Webflow: Once you've configured the DNS settings, navigate to your Webflow project settings. Under the "Hosting" tab, you can add your custom domain by entering your root domain without any www or http:// prefix.
- Publish and deploy your website on Webflow: After adding the custom domain, you're ready to publish and deploy your website on Webflow. Make sure all necessary changes are saved and then click on the "Publish" button to make your website live on the internet.
You are ready to publish!
Conclusion
In conclusion, "The Ultimate Step-by-Step Guide To Launching Your Webflow Website With Images: A Practical Approach" provides entrepreneurs with a comprehensive and user-friendly tutorial on creating a successful website using Webflow.
By following the step-by-step instructions and utilizing practical tips, you can save time and avoid common pitfalls in the website development process.
Whether you're a beginner or have some experience in web design, this guide will equip you with the knowledge and tools needed to launch a modern, optimized website that captivates your audience.